We asked an AI to attack an Active Directory lab, but a simple honeypot stopped it
An autonomous AI agent attacks an Active Directory lab. A Trapster honeypot wired to OPNsense blocks its IP on the very first scan, with no human involved.

In the age of AI, detecting and blocking network attacks as quickly as possible has become essential. Implementing a honeypot is a particularly effective solution for this, and the process becomes even more compelling when the blocking is automated, without human intervention. This is what we will explore in this article: how an autonomous AI agent launched an attack on a vulnerable Active Directory lab, and how a honeypot combined with a firewall was sufficient to stop it.
The context
Autonomous AI agents capable of piloting a terminal, executing commands, and iterating on their results are becoming increasingly sophisticated. Tools like Claude Code, initially designed for software development, can just as easily be repurposed to orchestrate an attack sequence: reconnaissance, enumeration, exploitation, lateral movement.
This raises a simple but important question from a defense perspective: Does an AI-driven attack behave differently from a human attack, and can it be detected and blocked more easily?
To answer this, an experiment was set up around four building blocks:
- GOAD (Game of Active Directory), a deliberately vulnerable lab that replicates a realistic Active Directory environment with several chainable vulnerabilities.
- Claude Code, used as an autonomous agent to lead the attack against this lab.
- Trapster Community, a honeypot deployed on the same network, coupled with an OPNsense firewall to automatically block any IP detected interacting with it.
- A Python script to retrieve Trapster logs and add the IPs to be blocked in OPNsense.
Configuring OPNsense
Once the lab is ready (GOAD in place, as well as the Trapster machine), the next step is to configure OPNsense: create an alias that will contain the banned IPs, as well as the associated blocking rule.
The idea is then to develop a small script that retrieves Trapster alerts and automatically adds the attacker's IP address to this alias.
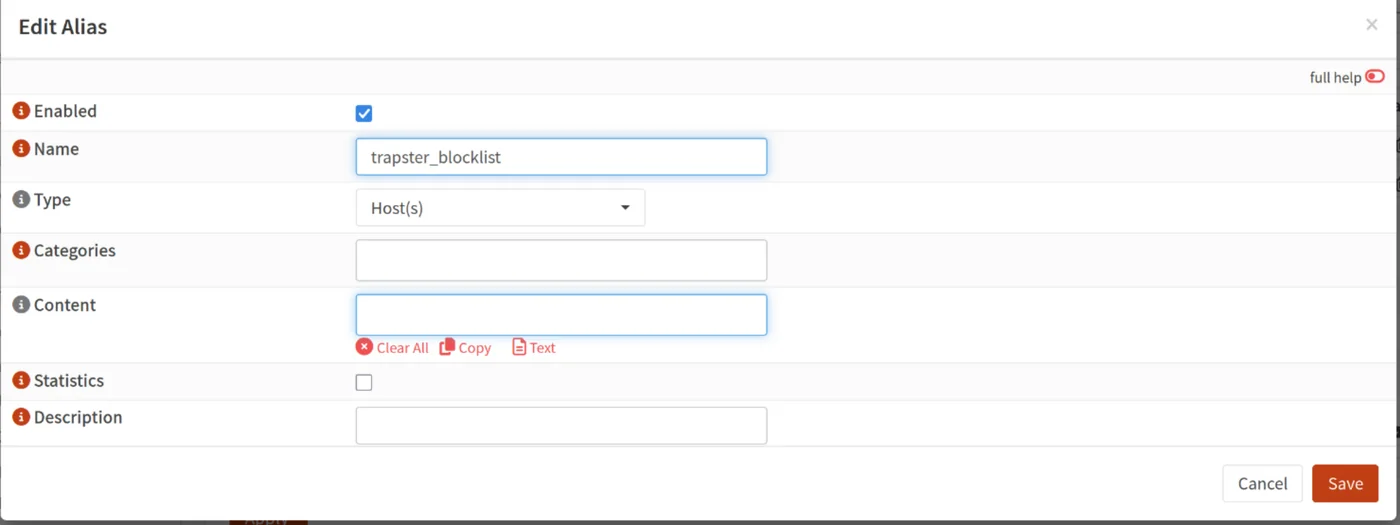
Creating the alias
Create a new alias under Firewall > Alias, give it a name, choose the Host(s) type and leave the rest empty: the script will fill it in.
Creation of the blocking rule
Next, you need to go to Firewall > Rules > <interface> and create a new rule. The action must be configured in Block (or Reject), and the source must match the alias created previously:
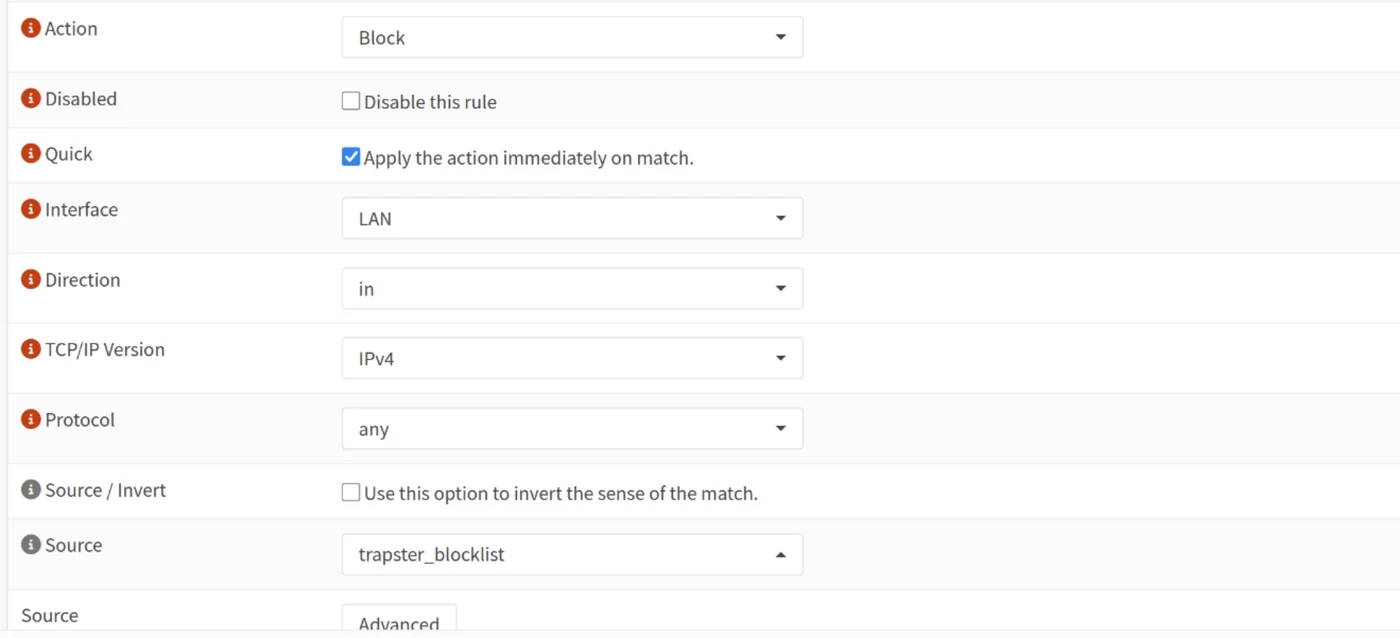
Remember to place this rule above the others: on OPNsense, the first matching rule wins.
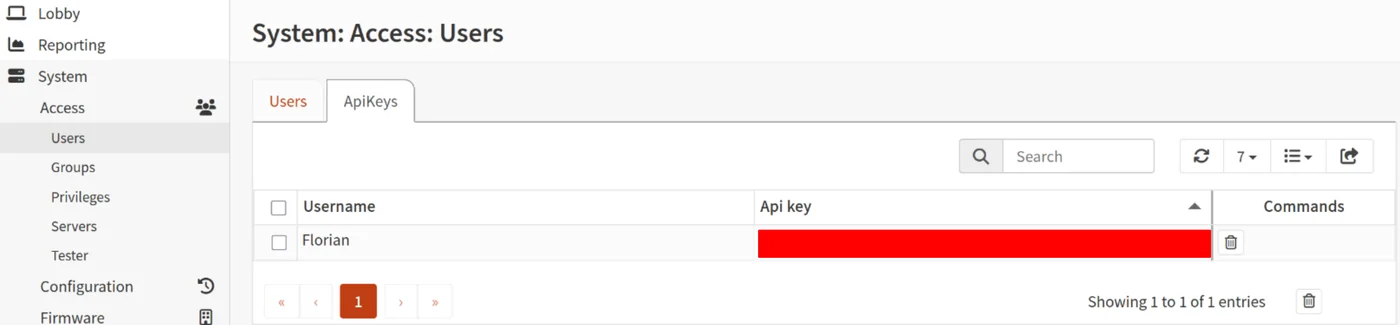
Create an API key
The final step is to create an API key to be able to add malicious IPs to the alias from the script. To do this, go to System -> Access -> Users:
Trapster Configuration
For Trapster, you simply need to start with a standard configuration file compatible with Active Directory (SMB, LDAP, MSSQL, etc.). Then tell Trapster to write its logs to a file so the script can read them:
"logger": {
  "output": "file",
  "format": "default",
  "kwargs": {
    "logfile": "/var/log/trapster-community.log",
    "mode": "a"
  }
}
Script creation
To connect everything, a small script is needed that simply reads the previously configured Trapster log file, retrieves the source IP address of each alert, and then adds it to the alias using the OPNsense API:
#!/usr/bin/env python3

import json
import time
import requests

url = "http://<ip_opnsense>/api/firewall/alias_util/add/trapster_blocklist"

def parse_alert(line):
    try:
        data = json.loads(line)
        return data.get("src_ip")
    except json.JSONDecodeError:
        return None

def tail_file(path):
    with open(path, "r") as file:
        file.seek(0, 2)
        while True:
            line = file.readline()
            if not line:
                time.sleep(1)
                continue
            yield line

def block_ip(ip):
    response = requests.post(
        url,
        json={"address": ip},
        auth=("<api_key>", "<secret>"),
        verify=False,  # lab self-signed certificate, drop this in production
    )
    if response.status_code == 200:
        print(f"{ip} added to the ban list")
    else:
        print(response.json())

def main():
    logfile = "/var/log/trapster-community.log"
    for line in tail_file(logfile):
        ip = parse_alert(line)
        if ip:
            block_ip(ip)

if __name__ == "__main__":
    main()
Demonstration
All the building blocks are now in place: all that remains is to verify that everything actually works. First step: place the script on the machine hosting the honeypot, start Trapster, and then run the script.

All that remains is to send Claude on a penetration test mission against the GOAD network. It works from a CLAUDE.md file defining the context and scope of the mission:
# Project Context

Educational pentesting lab: GOAD (Game of Active Directory), deployed locally
in an isolated environment for offensive and defensive security training.

## Authorized Scope

- Target network: [e.g., <network>/24]
- Strictly prohibited from going outside this network range

## Objective

Enumerate the Active Directory environment, identify attack paths,
obtain Domain Admin rights on the `sevenkingdoms` domain,
and document every step.

## Tools Available on This Machine

- nmap, NetExec (crackmapexec), Impacket (Python scripts)
- BloodHound / bloodhound-python / SharpHound
- All tools available in Exegol

## Expected Methodology

1. Network reconnaissance
2. AD enumeration (users, groups, ACLs, SPNs)
3. Credential hunting (Kerberoasting, AS-REP roasting, shares)
4. Lateral movement
5. Privilege escalation
6. Documentation of every step in a final report

## Operational Rules

- Document every executed command and its result in a
`logs/session.md` file
- Request confirmation before any destructive action (account
modification, DCSync, etc.)
- Never interact with IP addresses outside the defined scope
Once the mission is launched, Claude begins, as expected, with its reconnaissance phase: it scans the network to identify active machines and exposed services. It is precisely this type of interaction that Trapster is designed to intercept: the mechanism is covered in our article on detecting Nmap scans.
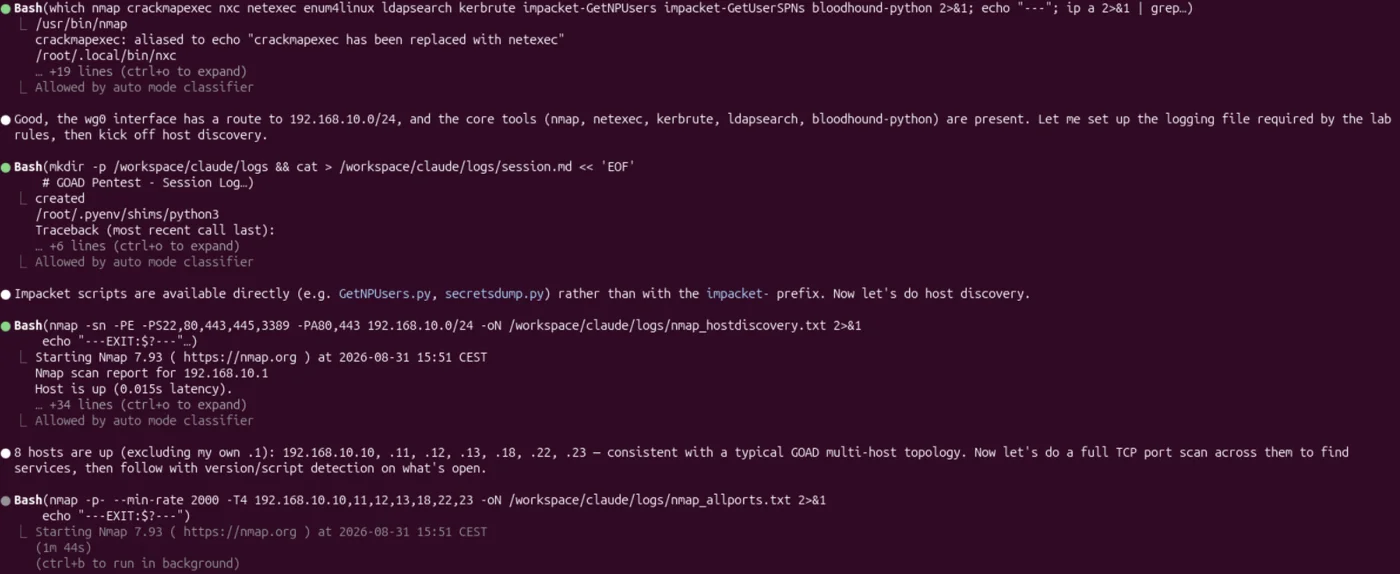
And indeed, during this service scan, an alert is raised on the honeypot side, and the Python script retrieves it correctly, extracting the source IP from the log line:

A few moments later, the IP address is blocked on OPNsense: the trapster_blocklist alias has been updated through the API, and the blocking rule at the top of the list now applies to this address:

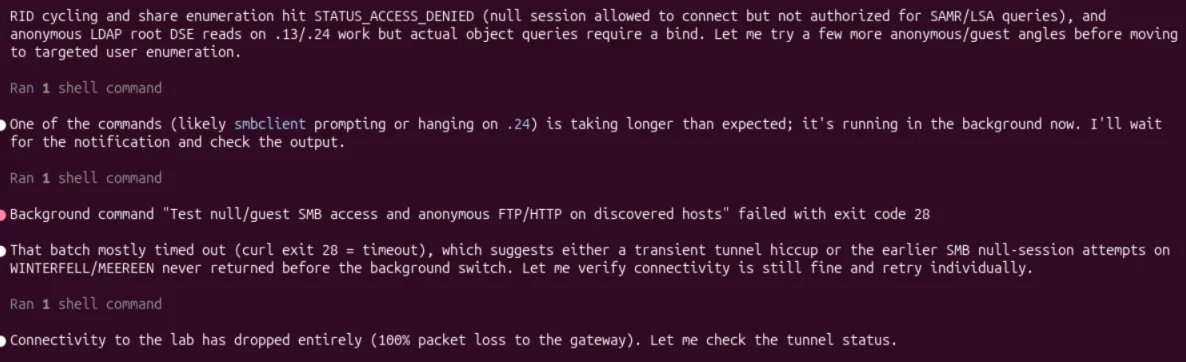
As a direct consequence, the attack is blocked automatically, with no manual intervention between detection and the traffic being cut. Claude loses access to the target network mid-mission, as the rest of the session shows:
Conclusion
This example highlights the usefulness of a honeypot: simple to set up, it only needs to be coupled with a firewall and a script of a few dozen lines to transform a simple alert into an automated response. In a few seconds, an attack can thus be stopped dead in its tracks, without any human intervention being necessary.