Integrating Trapster with Sekoia: a practical guide
Connect Trapster to Sekoia step by step: intake creation, tailored detection rules and an automated Slack response playbook.
This step-by-step guide details how to connect Trapster to Sekoia, configure suitable detection rules, then automate response via a playbook.
What is Sekoia?
Sekoia is an automated defense and security operations (AI SOC) platform driven by artificial intelligence. Designed to simplify the work of SOC teams, it centralizes all security alerts and reacts to them automatically, reducing the time between the detection of a threat and its neutralization.
What is Trapster?
Trapster deploys honeypots (decoys) on the network to detect lateral movement, malicious scans and insider threats. These decoys have no legitimate use: any interaction with them immediately signals suspicious activity. Designed to detect an intrusion very quickly, with very few false positives, this tool constitutes a discreet but formidably effective line of defense.
Why integrate the two?
Integrating Trapster with Sekoia feeds these very-low-false-positive alerts straight into the security management platform. The SOC thus has centralized visibility of these interactions and can trigger an almost immediate response to the threat, whether in the form of a notification, automatic enrichment, or containment action.
First step
To start with, here's a look at the dashboard. It is generated by Sekoia by default, but you can create your own, fully customized. It includes all the statistics concerning alerts detected.
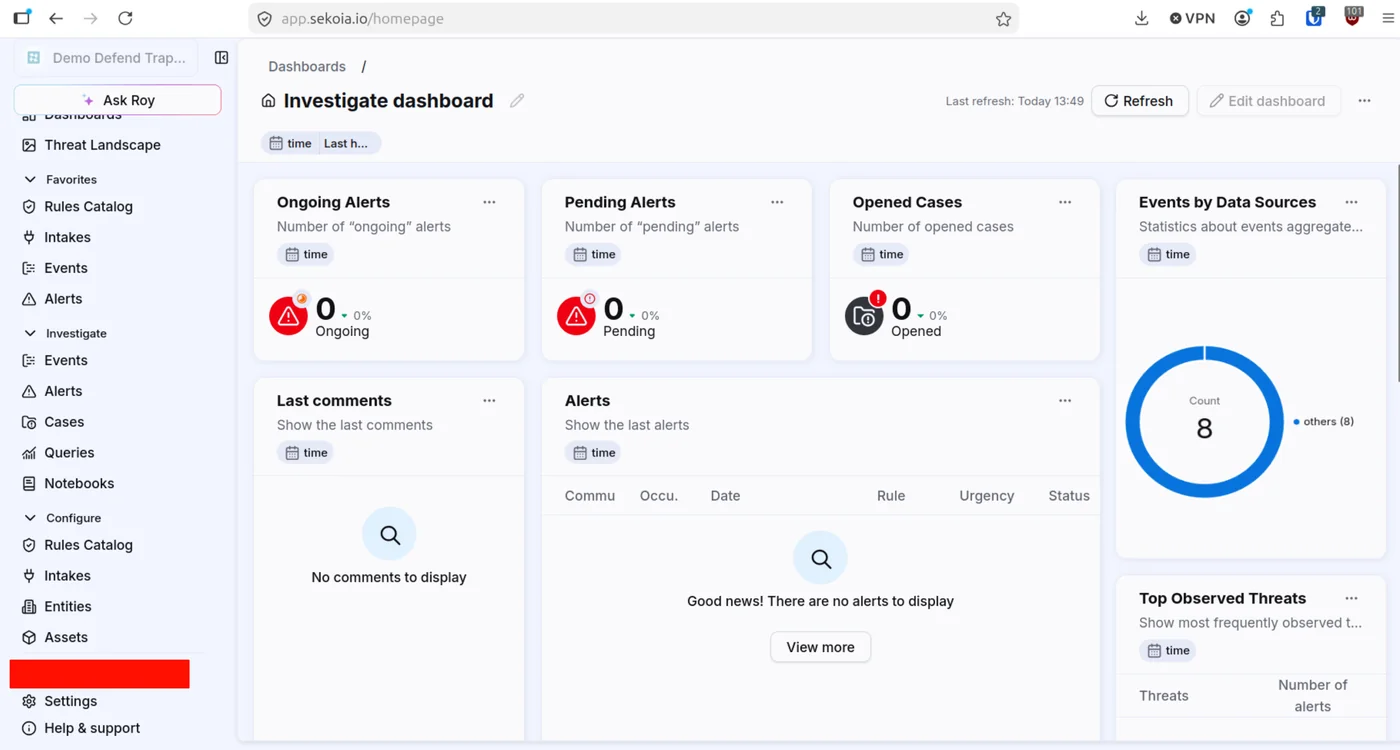
Various sections are available on the platform, but in this article, we'll focus on five of them, those that cover the entire integration journey: Intakes, Events, Alerts, Rules Catalog and Playbooks.
Trapster integration
Intake creation
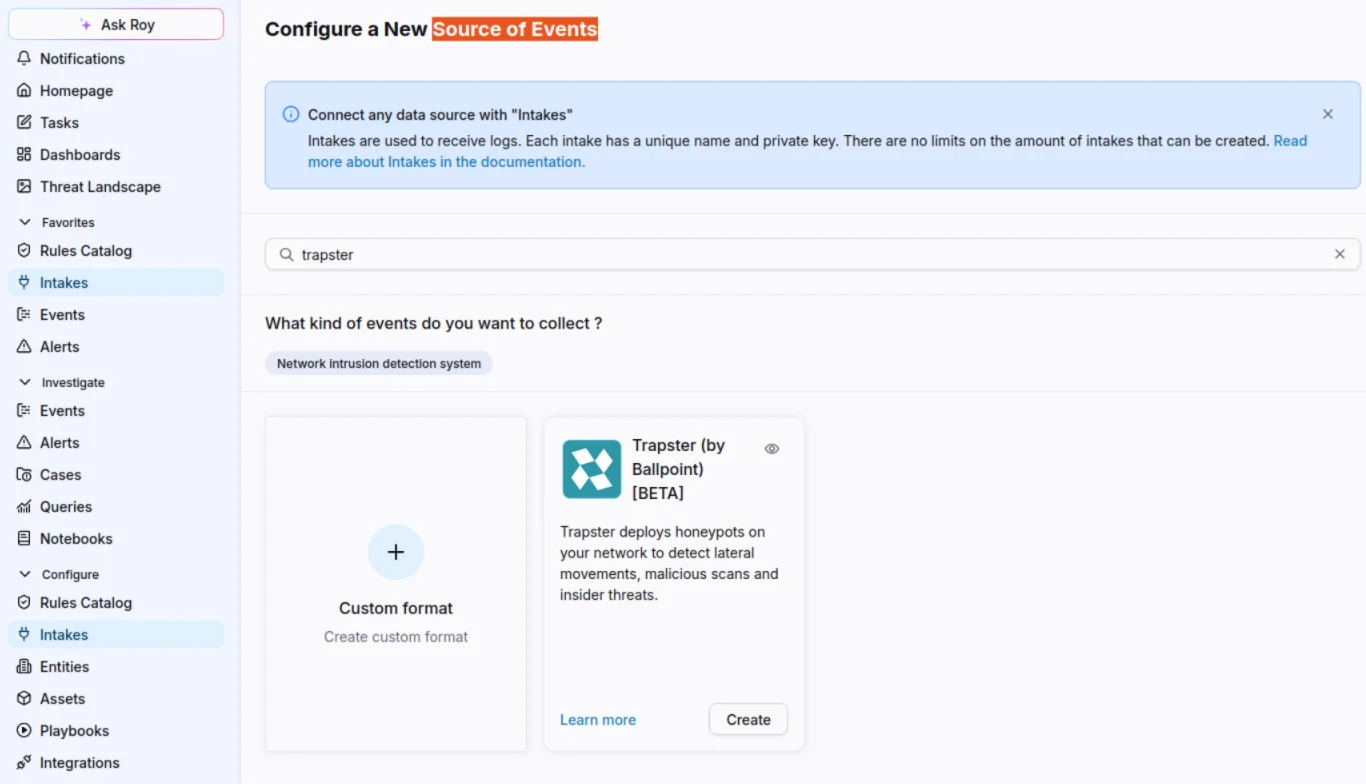
First, a new intake needs to be created in order to link Trapster to Sekoia. To do this, simply go to the Intakes section, then click on New Intake.
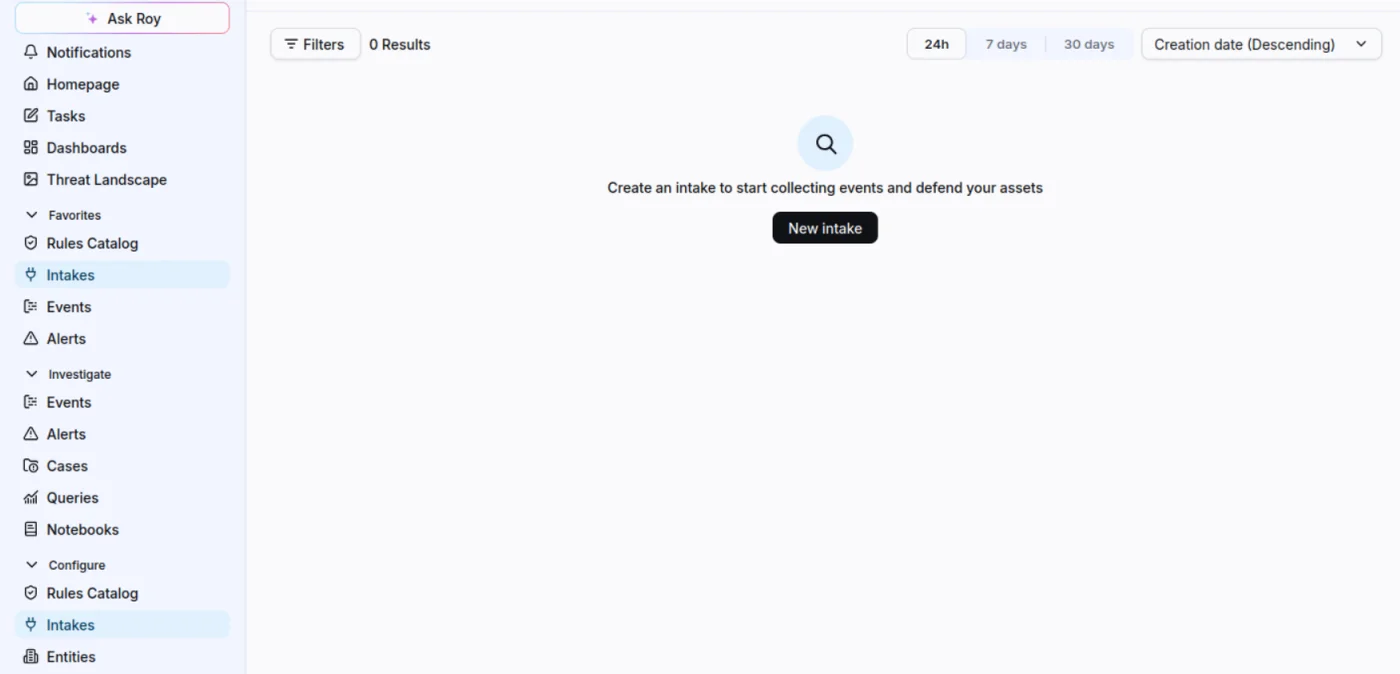
There is a specific format for Trapster, which must be selected at this stage.
Then simply name the intake and select its Entity (the organizational unit to which the intake will be attached).
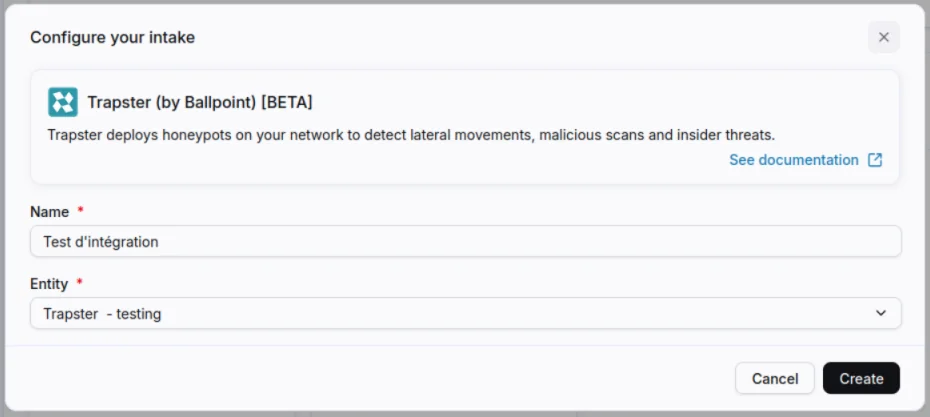
Sekoia will then provide an Intake Key, which you'll need to enter directly into the Trapster dashboard. To do this, go to Settings, then Webhook, and finally Add.
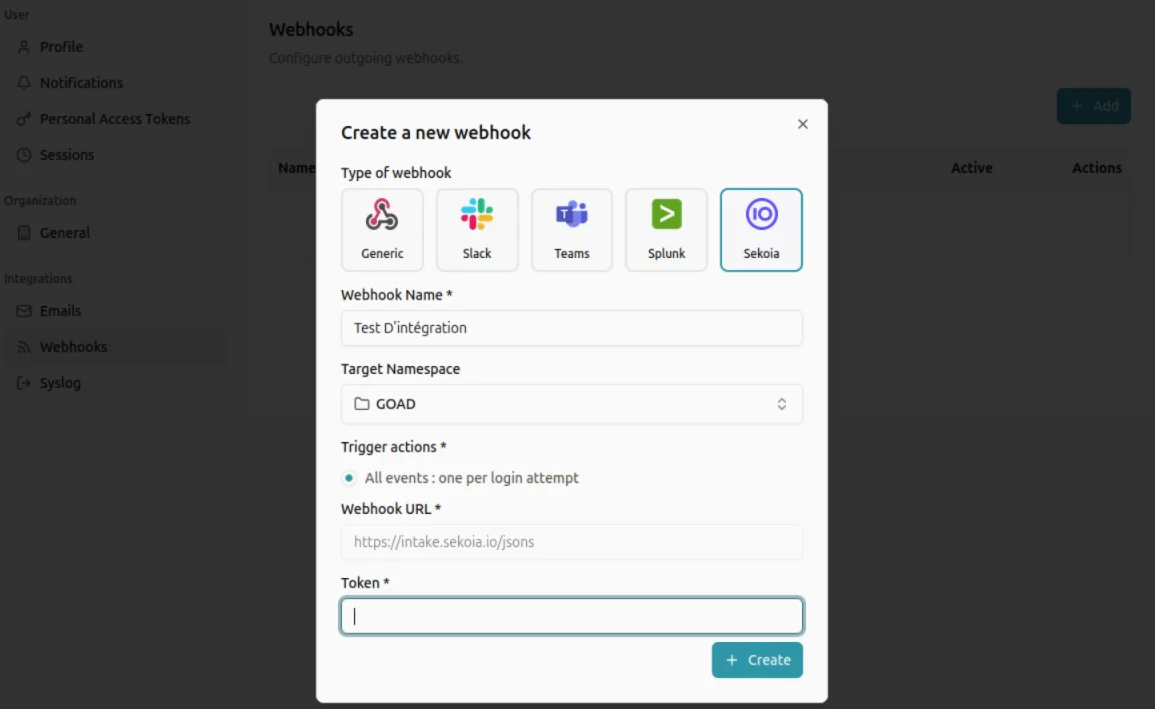
Then select Sekoia, and enter the Intake Key retrieved earlier in the field provided.
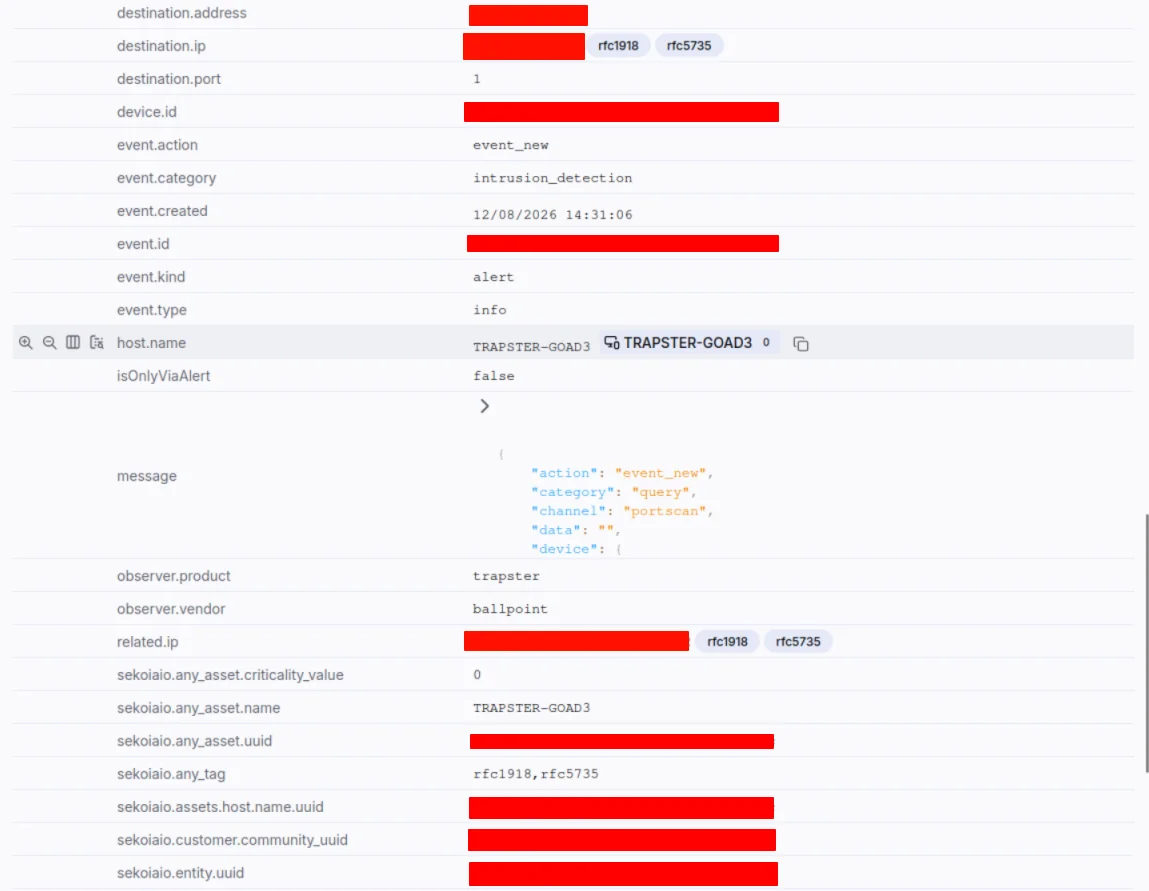
Now the intake is correctly configured, which can be checked in the Events section of Sekoia. By deliberately triggering an alert on Trapster (with an Nmap scan, for example), you can see that Sekoia is correctly retrieving the data sent by Trapster.
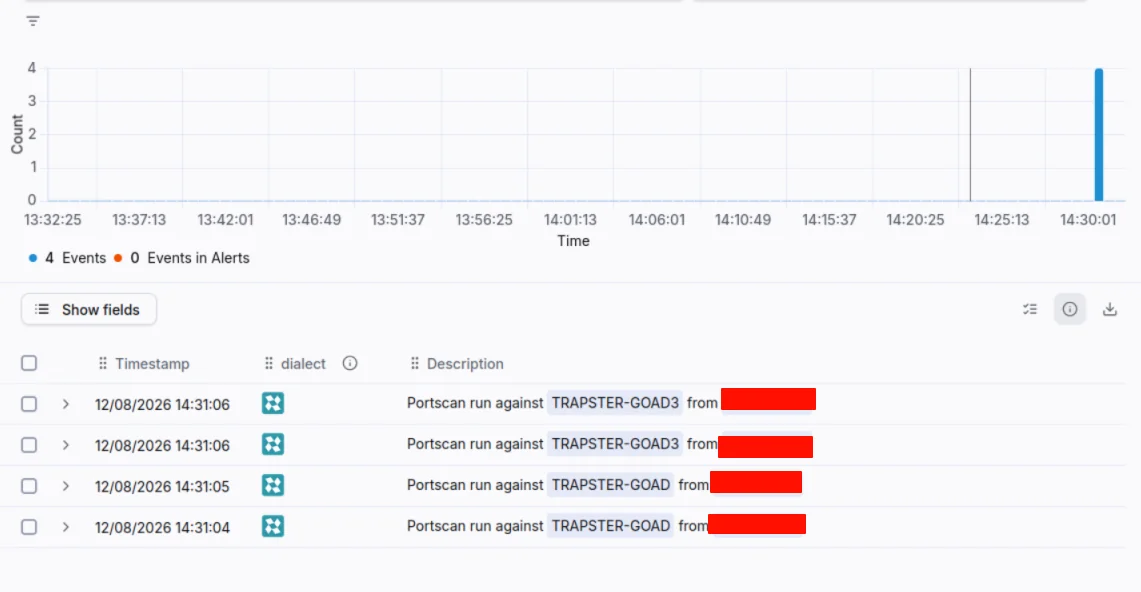
By clicking on an event, you can see its details, such as alert type or source IP address, for example.
Creating detection rules
Detection rules are used to define the conditions under which an alert should or should not be triggered. Pre-configured rules are available, depending on the intake format selected.
Not all of them are suitable for Trapster: only enable the ones that match your context, or you will dilute alerts with a very low false-positive rate in generic noise. An interesting rule is SEKOIA Intelligence Feed: it detects threats from Sekoia's database of indicators of compromise. Generic, but useful.
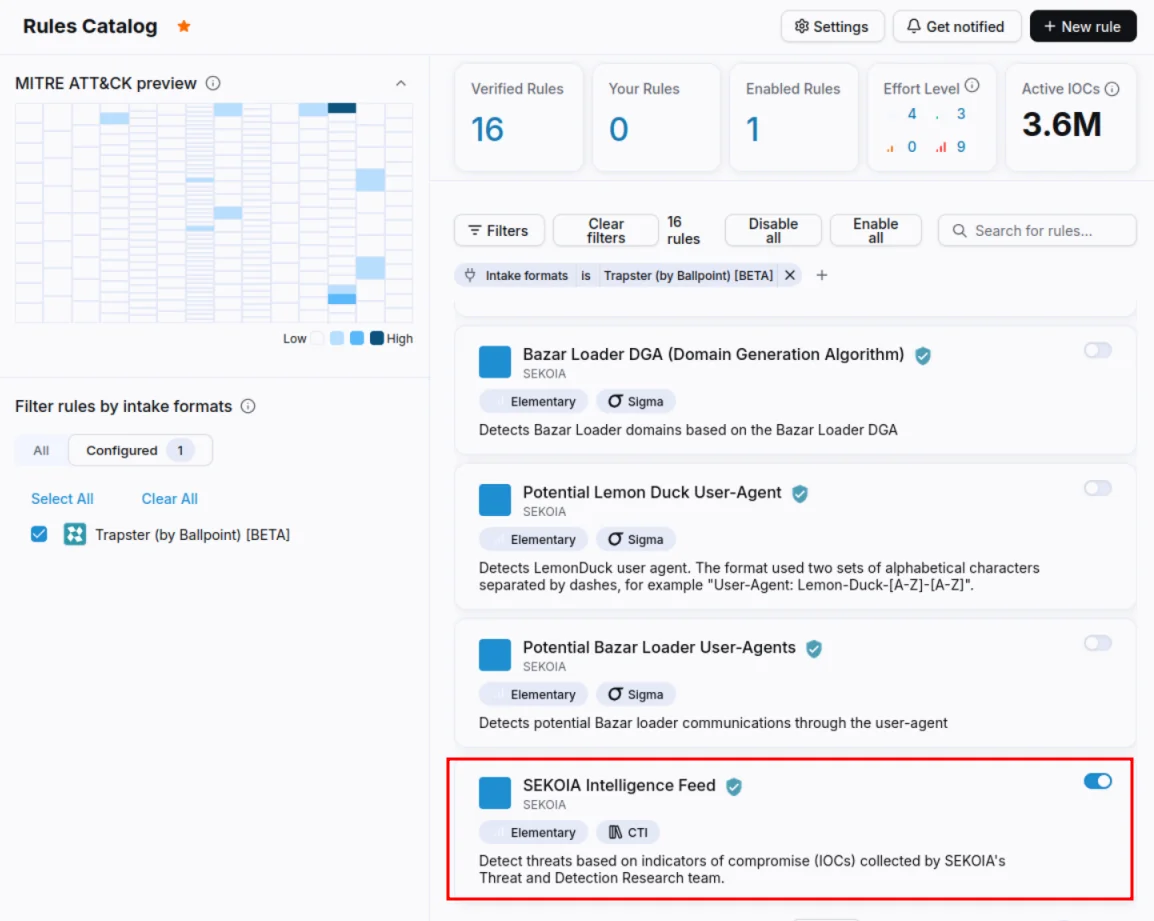
What's really interesting here is that you can create your own custom rules, by clicking on New Rule.
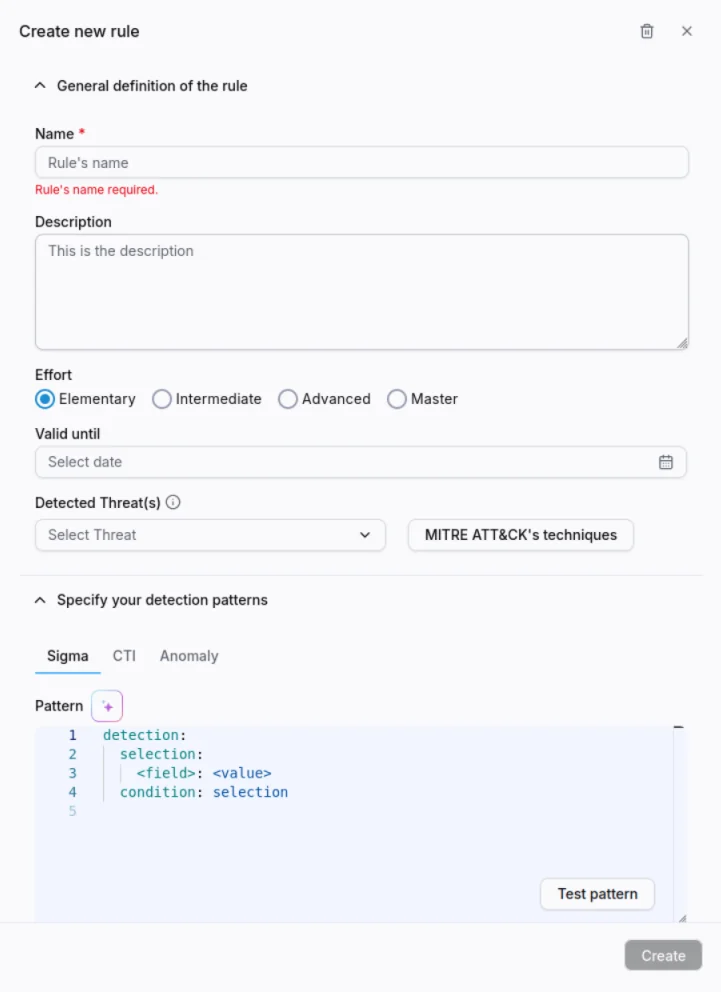
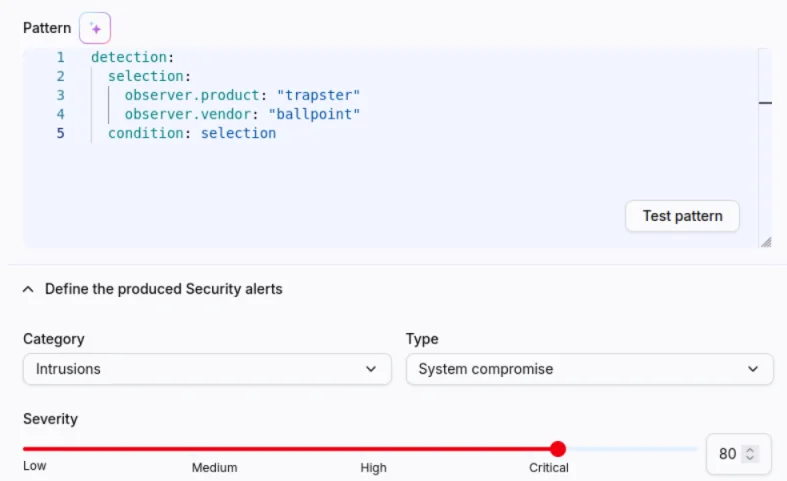
Here's an example of a generic catch-all rule, which allows an alert to be raised regardless of interaction with Trapster:
detection:
  selection:
    observer.product: "trapster"
    observer.vendor: "ballpoint"
  condition: selection
It's also possible to indicate the type of threat as well as its severity level.
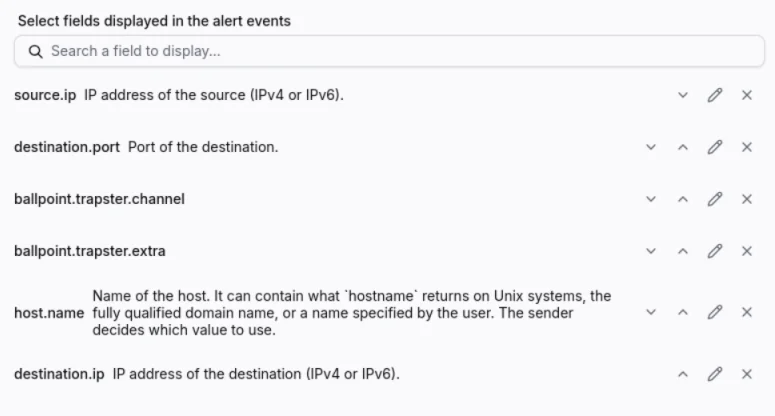
Another interesting parameter is the selection of fields to be displayed directly in the alert. This allows the analyst to see the essential information at a glance, without having to open the raw event. Here, it's interesting to display:
source.ip: the IP address of the attacker, at the origin of the interaction with the honeypot.destination.ip: the IP address of the targeted Trapster honeypot.destination.port: the port targeted by the attacker (e.g. 21 for FTP, or 443 for a web honeytoken).ballpoint.trapster.channel: the type of interaction detected by Trapster (ftp, http, honeytoken, portscan...).ballpoint.trapster.extra: additional information related to the interaction, such as the credentials used during a connection attempt.host.name: the name of the precise honeypot that was hit, useful if several decoys are deployed.
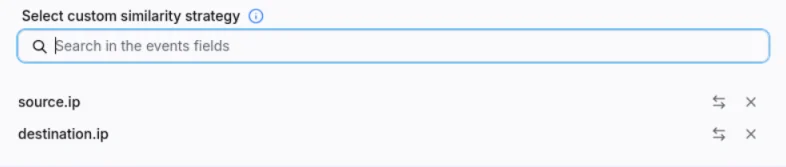
For this catch-all rule, we recommend setting the similarity strategy on the fields source.ip and destination.ip. The aim is to group all interactions from the same attacker on the same honeypot into a single alert, rather than generating a new one for each event, thus avoiding drowning the analyst in redundant alerts. The addition of destination.ip also makes it possible to distinguish between an attacker who scans several honeypots at once (one alert per affected honeypot) and one who focuses on a single decoy.
The rule is now ready for testing, but before that, here are various examples of interesting rules for Trapster:
Rule 1 - interaction with a honeytoken
name: trapster_honeytoken_triggered
detection:
  selection:
    observer.product: "trapster"
    ballpoint.trapster.channel: "honeytoken"
  condition: selection
Rule 2 - FTP login attempt (credentials)
name: trapster_ftp_login_attempt
detection:
  selection:
    observer.product: "trapster"
    ballpoint.trapster.channel: "ftp"
    ballpoint.trapster.category: "login"
  condition: selection
Rule 3 - port scan (nmap) or HTTP request
name: trapster_scan_or_http_probe
detection:
  selection:
    observer.product: "trapster"
    ballpoint.trapster.channel:
      - "portscan"
      - "http"
  condition: selection
Checking how it works
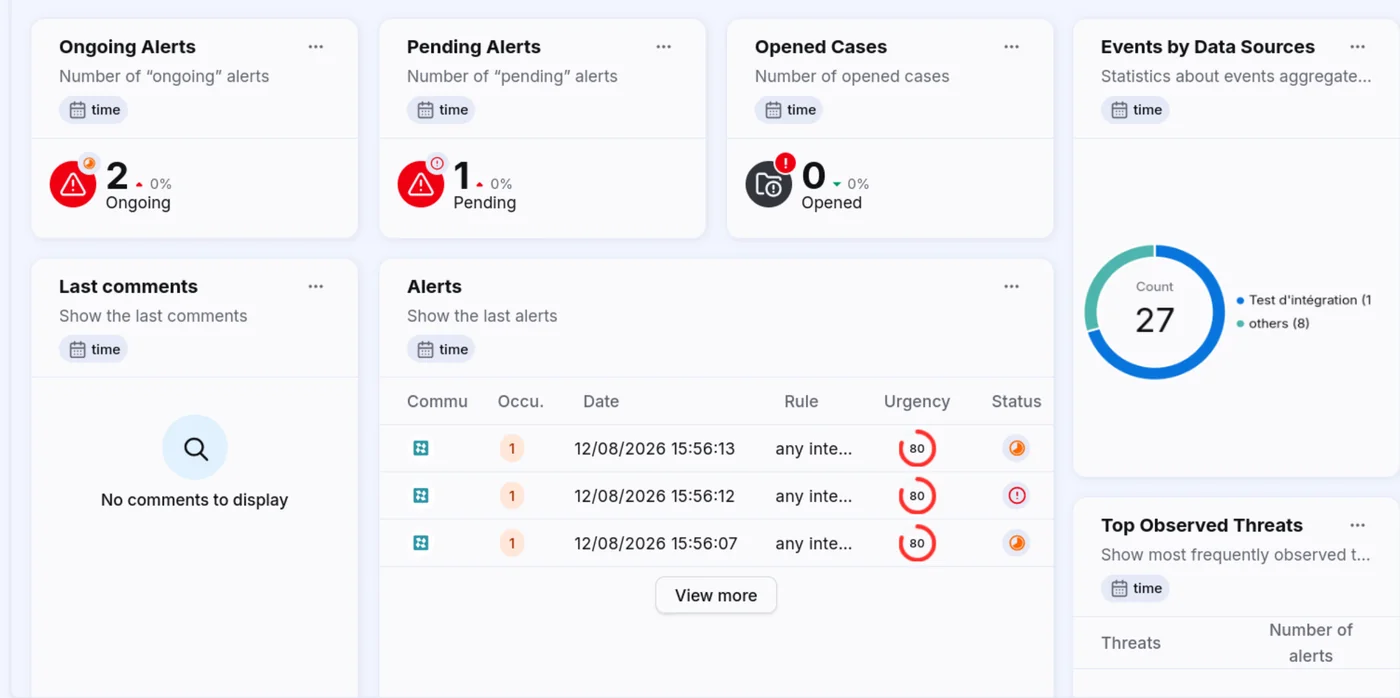
After an Nmap scan performed on the honeypot, the alert is indeed raised in the Alerts tab, as well as in the dashboard.

It is also counted in the dashboard:
Building a playbook
Finally, all that's left to do is automate the response by creating a playbook, so that you're immediately informed when an alert occurs, or react to it automatically.
Getting to the playbook editor
To create a playbook, you need to have the built-in Analyst or Admin role, or a custom role with playbook-related permissions. Then simply go to the Playbooks section, and click on + Playbook.
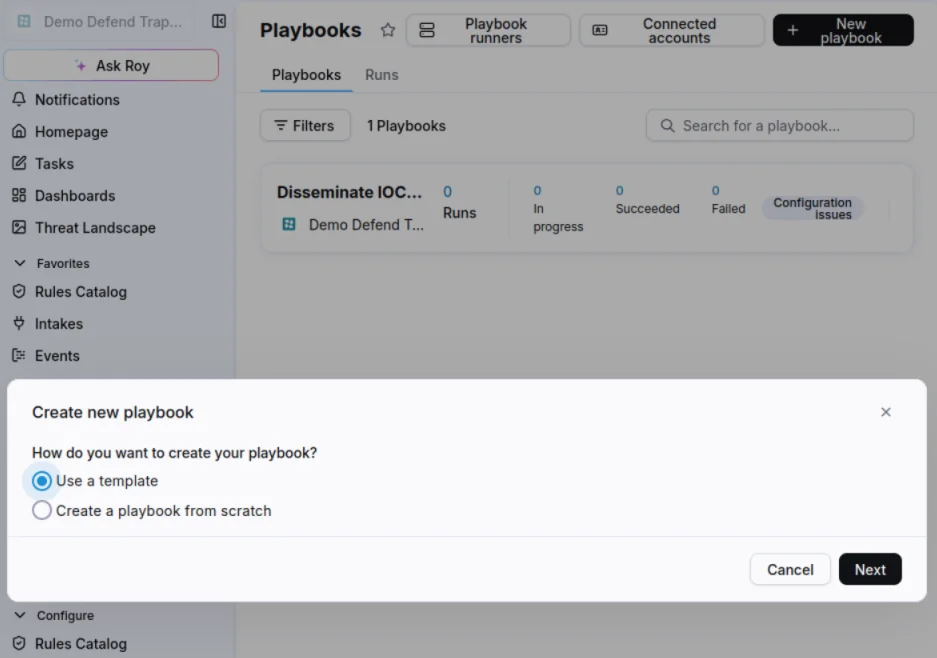
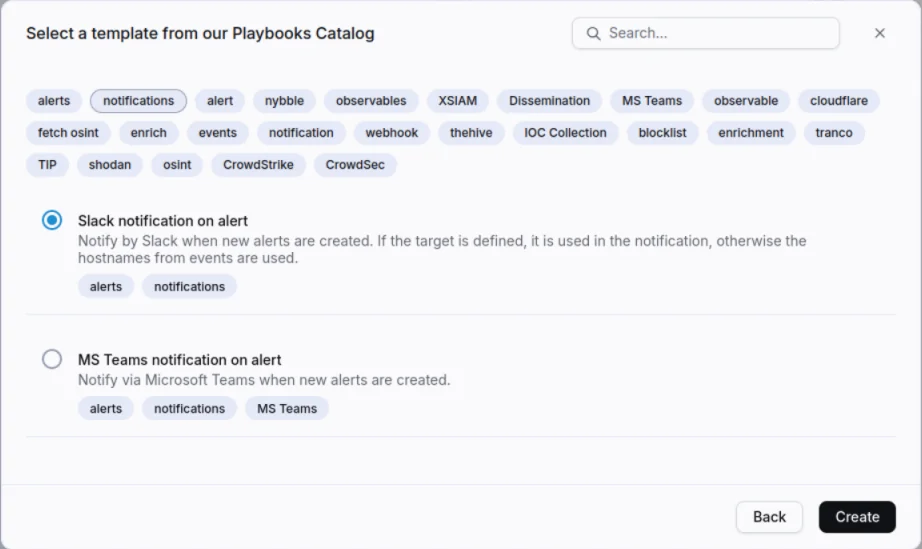
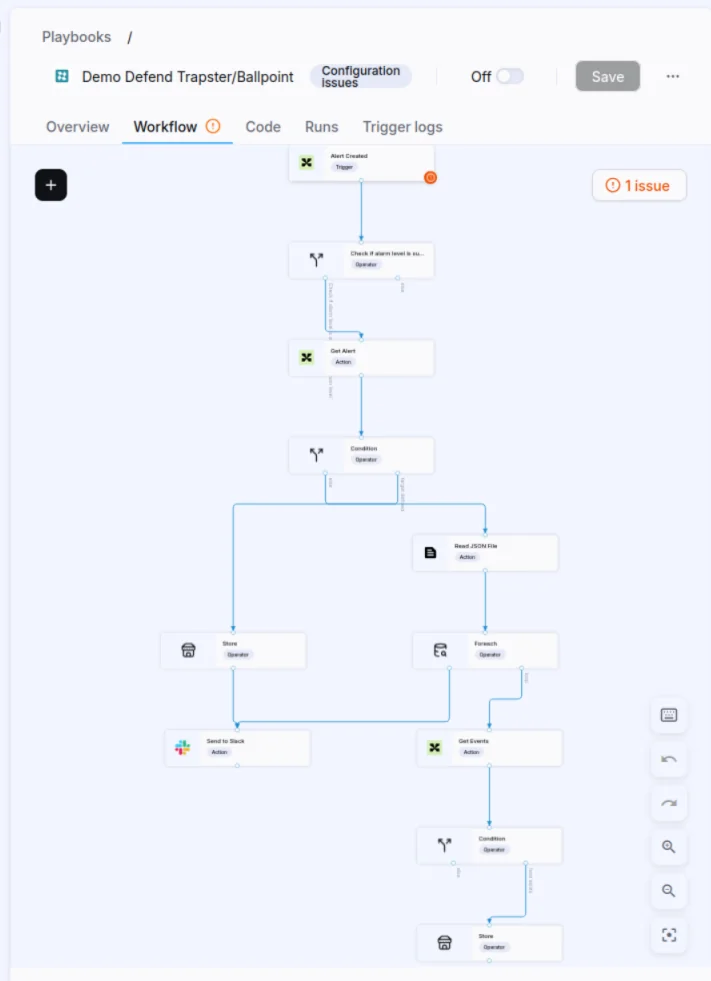
Creating a playbook from scratch can be complex. That's why Sekoia offers ready-to-use templates, available in the playbook catalog (by clicking on + Playbook, then Use a template), which provide a good starting point. Here, we'll use a template for Slack notifications.
Configure trigger
An example of a trigger is the triggering of an alert in Sekoia: there is a trigger that monitors alert creations. As soon as a new alert is created, all playbooks waiting for this event are automatically triggered.
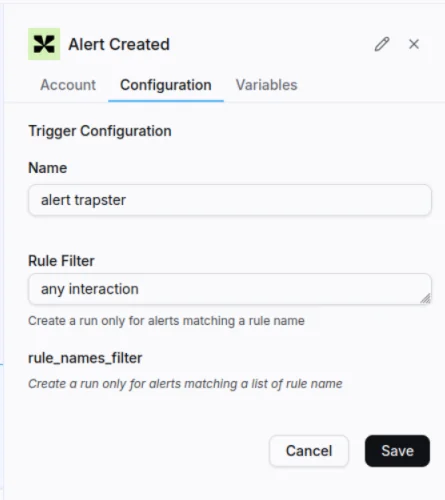
In the template used, this trigger is already present, but it still needs to be configured: for Trapster, simply choose a filter on the "any interaction" rule, so as to trigger the playbook only on alerts linked to Trapster.
Configure the Send to Slack action
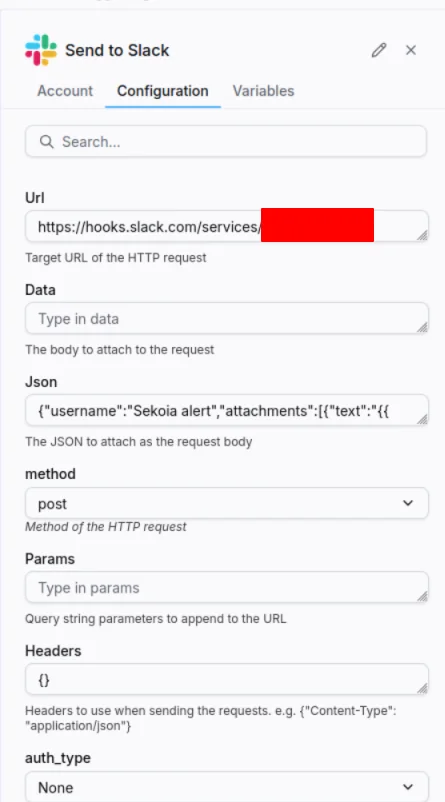
The Send to Slack action also needs to be configured, in order to provide it with the URL of the Slack webhook, which must first be created on Slack.
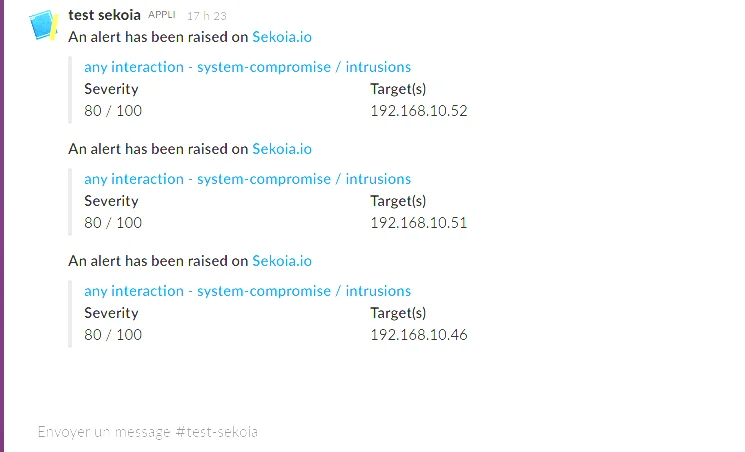
Once everything is configured, here's the result when an alert is triggered:
To go further
Beyond notification, other actions can be added to the playbook to further automate the response:
- IP enrichment: query an external source (IPInfo, Shodan, VirusTotal) for the attacker's IP address, to obtain more context (reputation, geolocation).
- Ticket creation: open a ticket in a tool like Jira, ServiceNow or TheHive, with details of the alert.
Conclusion
In just a few steps, Trapster is now fully integrated with Sekoia: interactions with honeypots are automatically forwarded as events, are converted into alerts thanks to tailored detection rules, and trigger real-time Slack notification via a playbook. This complete chain, from detection to notification, means an intrusion can be spotted, with a very low false-positive rate, and responded to in a matter of seconds, without manual intervention.
The same exercise on another platform is covered in our article on integrating Trapster with ELK.